
We may earn money or products from the companies mentioned in this post.
Unleash the full impact of your photos through the masterful use of lighting. Imagine capturing a stunning image that transports you to another place, evokes a particular emotion, and leaves a lasting impact on its viewers. How do you make this happen? While many photographers might reach for artificial light sources, the secret to elevating your photos lies in using ambient light. Get ready to unlock its full potential as we guide you through the magical world of creating a mood and atmosphere with just the power of light.
 So what is Ambient Light?
It refers to the natural light in a scene, including all light sources, such as sunlight, moonlight, and artificial light from street lamps, windows, or lamps. In photography, ambient light is pivotal in setting the tone and mood of an image. It can vary greatly, from soft and gentle to harsh and contrasting, influencing the colors, shapes, and textures captured in a photo. A deep understanding of ambient light’s properties and behavior is critical to produce stunning visuals and effectively conveying a story through photography. By harnessing its power, photographers can bring their photos to life, capturing the essence and atmosphere of the scene.
So, how do you use Ambient Light in photography?
Identify the source of ambient light. Ambient light is the existing light in a scene, and it can come from various sources, such as windows, doors, skylights, or open shade. In photography, identifying the source of ambient light is crucial in creating the desired look for your image.
When shooting indoors, for example, you may find that the existing light coming from windows is too bright or harsh or that the light coming from an overhead light source is too dim. Knowing the source of the ambient light allows you to make adjustments to your camera settings, as well as to your subject’s position, to get the desired lighting effect.
In outdoor photography, ambient light can be even more complex, as the light source can change throughout the day and be affected by weather conditions. Identifying the source of the ambient light and understanding its direction, quality, and color temperature are critical to creating well-lit and impactful photos.
After determining the source of the ambient light, it is essential to assess its direction. Is it coming from above, below, or the side? The direction of the ambient light plays a crucial role in shaping the mood and atmosphere of your photo.
For example, if the ambient light comes from above, it can create a more dramatic look with strong shadows and highlights. If the ambient light comes from the side, it can create a more dramatic yet natural look with soft shadows and gradually transition from light to dark. If the ambient light comes from below, it can create an eerie and mysterious mood with deep shadows and a dramatic play of light and dark.
Identify ambient light source and direction for creative control and strong emotional impact in photos.
Experiment with light direction. By moving your subject around, you can find the best angle for the ambient light to hit them, creating the desired look and mood for your image. Experimenting with light direction can help you control the shadows and highlights in your image, making the subject stand out and creating more depth and dimension.
For example, place your subject near a window to create a more dramatic look with strong shadows; the ambient light hits them from the side. Alternatively, position your subject, so the ambient light hits them from behind or above to create a gentler, more even light.
It is crucial to experiment with the direction of ambient light when creating well-lit and impactful photos to identify the most appropriate angle for illuminating your subject. This technique will help you achieve your image’s desired mood and appearance.
Adjust your camera settings. You have complete control over your camera settings when shooting in manual mode, including the aperture, ISO, and shutter speed. By adjusting these settings, you can balance the ambient light with the available light and create the desired look and mood for your image.
Aperture: The aperture controls the amount of light that enters the camera and affects the depth of field in your image. A wider aperture (lower f-number) will let in more light and create a shallow depth of field, while a narrower aperture (higher f-number) will let in less light and create a deeper depth of field.
ISO: The ISO controls the sensitivity of the camera’s sensor to light. Increasing the ISO setting of your camera will let you use a faster shutter speed in dim lighting, but it will also create more grain in your photo. A lower ISO will produce a cleaner image but may require a slower shutter speed.
Shutter speed: The shutter speed controls the time the camera’s shutter is open, letting light into the camera. A faster shutter speed will stop motion, while a slower shutter speed will produce a blur.
By adjusting these settings to balance the ambient light with the available light, you can create well-lit and impactful images that match your creative vision; trying out various configurations and finding the ideal combination for your particular shooting scenario is crucial.
Use reflectors. Using reflectors is a great way to redirect and control the ambient light in your scene, creating a more even and managed light source.
Manufacturers typically make reflectors from lightweight and portable materials such as foam core or fabric, and they offer them in various shapes, sizes, and colors. By placing a reflector near your subject, you can reflect light onto your subject, filling in shadows and creating a more balanced and even light source.
For example, if you’re shooting outdoors on a sunny day and your subject is in the shade, you can use a reflector to redirect the sun’s light back onto your subject, filling in the shadows and creating a more even and controlled light source.
You can also use reflectors to alter the color temperature of ambient light. Using a reflector with a gold or silver surface can add warmth to your images, while a white or neutral surface will reflect a cooler light.
The importance of timing. The timing of your photo shoot is crucial for the quality and appearance of your images, as ambient light changes throughout the day, influencing the color and quality of the light in your scene.
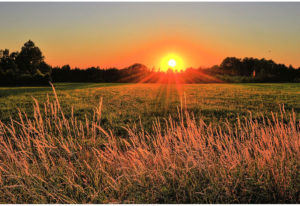
For example, early in the morning or late in the afternoon, the sun is lower in the sky, creating warm and soft light, known as the “golden hour.” You can use this warm light to produce beautiful and natural-looking images with soft shadows and a warm atmosphere.
Mid-day, the sun reaches its peak in the sky, casting harsh and bright light that creates strong shadows and high-contrast images. To harness this light’s drama, tweak your camera settings to prevent overexposure.
Other than the changing color of light throughout the day, weather and environment also impact the quality of ambient light. You can use soft and even light on overcast days to create beautiful and moody images.
Therefore, it’s essential to consider the timing of your photo shoot and experiment with different times of day to see what works best for your specific scene. You can maximize your shooting time and create beautiful, well-lit images by being mindful of the changing ambient light.
Use light to create the mood. Using light to create mood in your photos is an essential aspect of photography. Ambient light plays a significant role in the mood and atmosphere of your images, and you can use it to your advantage to create a specific feel.
For instance, warm light, like the golden hour’s glow, generates a cozy and welcoming vibe in your photos. Use this light to craft soft and natural images with warm hues and gentle shadows.
Conversely, cool light, like a cloudy day’s glow, creates a more dramatic and moody ambiance in your photos. Harness this light to craft moody and atmospheric images with cooler tones and soft, even lighting.
Light color temperature is not the only factor influencing an image’s mood. The direction and nature of lighting can play a crucial role as well. Shadows and contrast also set the tone; for instance, intense shades give off a dramatic and somber vibe, while gentle shadows produce a calm and welcoming atmosphere.
Therefore, you must consider the mood and atmosphere you want to create in your images and use the ambient light to your advantage. By being mindful of the light in your scene, you can create beautiful and impactful photos that convey the mood and feeling you desire.
Use ambient light to add depth. Combining ambient and directional light can help you create depth and dimension in your photos. Ambient light provides the overall illumination for your scene, while directional light can add depth, texture, and shape to your subjects.
For example, if you place your subject near a window, the natural light from the window can act as the ambient light for your scene. Using a flash or other light source to add a rim light or fill light can bring out the details and create more depth in your image. A rim light is a light that illuminates the edges of your subject, creating a separation between the subject and the background. On the other hand, a fill light softens the shadows and brightens the darker areas of your image.
Combining ambient and directional light can create a more balanced and dynamic image with greater depth and dimension. This technique is especially useful in portrait photography, where you want to create a three-dimensional feel for your subjects and bring out their features.
Try out various lighting arrangements and discover the one that works best for your scene. By mastering the use of ambient light and directional light, you can create beautiful and impactful images with depth and dimension.
High-key and low-key lighting: You can achieve a high-key or low-key effect by manipulating ambient lighting. High-key lighting is characterized by bright ambient light, resulting in a bright and airy atmosphere. In contrast, low-key lighting utilizes subdued ambient light to evoke a moody and dramatic feel.
Combine with artificial light. If your scene’s ambient light is insufficient to capture the image you want, you can supplement it with artificial light sources. These can include flash units, LED lights, or studio strobes. You can use these artificial light sources to brighten and balance your scene.
Artificial light sources can not only augment light, but they can also manipulate the prevailing ambient light. By adjusting the light’s warmth, brightness, or color temperature, you can fine-tune the quality and direction of lighting to establish the desired mood and atmosphere in your images.
For example, if you’re shooting in a location with warm ambient light, you can use a flash unit with a warming gel to match the color temperature of the ambient light and create a more natural-looking image. If you want to create a cooler, more dramatic image, you can use a flash unit with a cooling gel to change the color temperature of the light.
It’s important to experiment with different lighting setups because there is no one-size-fits-all scene. With artificial light sources, you have more control over the lighting in your scene, allowing you to capture the images you want, even in low-light conditions.
Practice and experiment. Finally, practicing and experimenting with ambient light is crucial in developing your photography skills. Shooting in different lighting conditions and with various ambient light sources will help you understand how light behaves and how it can impact your images.
For example, you can practice shooting at different times of the day to see how the quality and color of ambient light change. You can also experiment with different sources of ambient light, such as natural light, streetlights, and indoor lights, to see how they affect the look and feel of your images.
You can also experiment with various camera settings, including aperture, ISO, and shutter speed, to discover their impact on capturing ambient light in your photographs. This experimentation will assist you in finding the right balance between available and ambient light and adjusting your camera settings to attain the desired result.
Practice and experimentation are vital in developing your skills by using ambient light. As you experiment, you will better understand how to use ambient light to create the mood, atmosphere, and look you desire in your images.
To sum it all up!
Using ambient light to create mood and atmosphere in your photos can significantly enhance the impact and interest of your images. By understanding the different qualities, color temperatures, and directions of ambient light and experimenting with different camera settings, you can master the power of ambient light techniques and transform your photos. So next time you’re out shooting, take advantage of the natural light around you and see how it can elevate your photos.
Купить диплом с гарантией подлинности: Ваш путь к успеху начинается здесь
куплю диплом с занесением http://kupyt-diplom.ru/ .